
Prefab libraries allow you to easily store pieces from your levels that can be used over and over. Good examples of this would be hallways, light fixtures, unique objects (vehicles, etc), and furniture.
The first step in creating a library is...well...creating the library.
In the Prefab Factory dialog, click on the Add Library button. The Edit Library dialog will appear. In this, you can enter the name of the library and a brief description. Press Enter to create the library.
Now, you have an empty library and a map with several objects you'd like to add as prefabs. The process is quite simple.

Find the object in your map, and select all of it. In the New Objects dialog, press the Create Prefab button.

The Create Prefab dialog will appear allowing you define the name and description of the prefab, as well as which library it will be placed into. Repeat this for as many objects as you'd like.
Placing Prefabs
Placing the objects you make is just as simple.
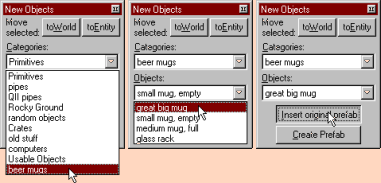
Simply select the library from the Categories list, select the object from the Objects list, and press the Insert original prefab button. The object will be inserted in your map, centered in the 2D views. For more information on placing prefabs, see creating solids.
Related Topics: