
The textures dialog shows you the current texture you are working with. Using the Current texture scroll box, you can pick from previously used textures. The Texture group scroll box allows you to choose which of the various texture groups to use if you do not wish to use all of them.
Texture Browser
The Browse... button opens the texture browser, where you can select from all available textures (as dictated by the Texture group selection).
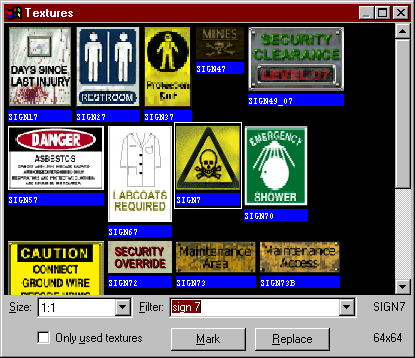
The Size scroll box allows you to set the displayed size of the textures. You can choose from 32x32, 64x64, 128x128, or 1:1 (full size).
The Filter box allows you to type in a string. Any texture that has that string as a part of its name will be displayed. You can specify more than one filter string. For example, if you specify the search string "+0 1", textures such as sign7 and sign37 will be displayed. Previous search strings can be accessed by clicking on the down arrow.
The Only used textures option will make the browser only display textures that have been used in your level. This will allow you to narrow your texture usage down and avoid using different textures for the same purpose. This will have an effect on both WAD and WAL type texture systems.
The Mark button will allow you to mark (select) all texture faces that contain the selected texture. You can then adjust those faces as required (textures, surface attributes, etc). This is best used in conjunction with the Face Properties dialog. If the normal "Apply Textures" map tool is used, every face of a brush that has one face selected will have the new texture applied.
The Replace button (also accessible through the Tools menu) will bring up the Replace Textures dialog
Related Topics: