tutorial: using light (tut4.rmf)
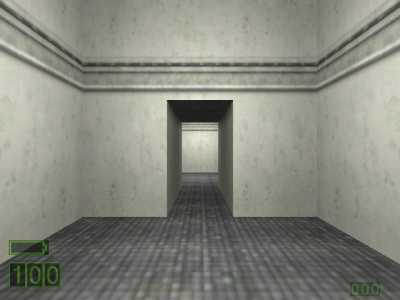
The rooms are starting to look much better than when we started out, but the lighting is rather bright and has no apparent source. We will fix this now.
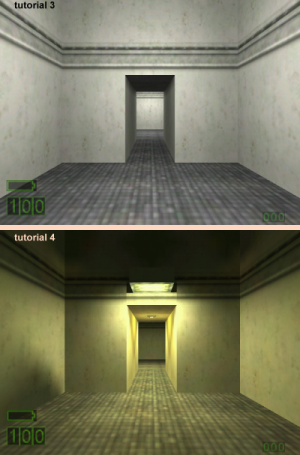
First, here's our baseline picture...
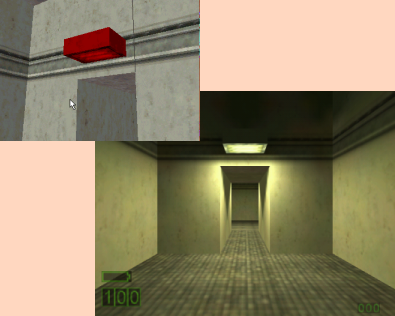
Now, delete both of the point based light entities. Their time is up. Create a rectangular solid of 32x48x16 units with the texture c1a1w1d. Using the texture application tool, apply the +0tnnl_lgt1 texture to the underside of the newly created solid. Place this solid centered just above hallway between the rooms. Do this for both sides. As usual, press F9 and Enter to compile and test your map.
Note: If your level turned out all black, that means that the +0tnnl_lgt1 texture is not listed in the default RAD file. This RAD file controls the default color and brightness of texture lights. It is located in the half-life\valve directory.
To make a custom RAD file for this level, make a text file in valve/maps/ (or wherever you're compiling the map) and enter the following:
+0~TNNL_LGT1 240 230 100 10000
and save the file as levelname.RAD. The format of each line is simply: "texture_name redvalue greenvalue bluevalue brightness", one texture per line.
If you instead want to add this light to the default RAD file, you will find lights.rad in the half-life\valve\ directory. You can add the same line to it.
As you can see, it looks way better like this. Texture lighting tends to look more natural and much more realistic than point based lighting. Once you've setup your default RAD file, texture lighting is extremely easy to use.
Point Based Lights
That said, point based lights aren't totally useless. They are much more customizable from within the map than a texture based light.
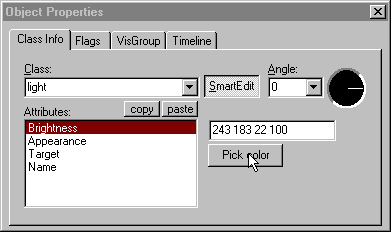
The Properties dialog for the light allows you to customize the brightness, color, appearance (flickering, fading, etc), target, and name. Also, in the Flags section, you have the option of making the light start dark.
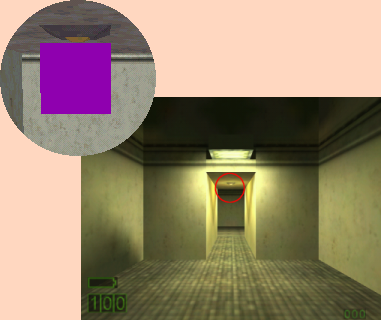
In the level for this tutorial, I've created a small light fixture in the middle of the hallway. Underneath, I've placed a light entity with a Brightness (key of "_light") of value "243 183 22 100". This means, the light has an RGB color value of 243 183 22, and a brightness of 100. The Appearance (key of "style") has a value of 6, which is listed as "Flicker A" in SmartEdit's pulldown list.
The difference is...?
When you compare the difference between the level after the last tutorial, and as it is now, you'll see it is quite dramatic.
In the next tutorials, we'll be adding some details, both brush and entity based, to make this a little more like a "real" place.
Related Topics: