tutorial: texturing (tut3.rmf)
Textures are easily one of the most important aspects of a level. They can create or detract a great deal from the atmosphere, and so, a certain amount of thought must be put into your texture selections.
For this tutorial, you'll want to make sure the camera is inside part the tutorial level. You'll also need to be able to move it around to look at specific parts of the level. For information about moving the camera and 3D view, see using cameras in the User's Guide.
Choosing the Textures
The first thing to do is decide what kind of theme your level. You don't need to go into exhaustive detail here, just have a general idea.
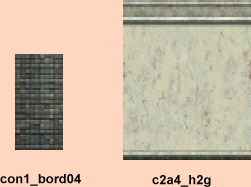
After a quick scan of the textures, I've decided to use con1_bord04 for the floor, and c2a4_h2g for the walls. We'll leave the ceiling as-is for now.
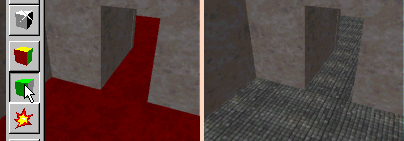
With the Selection tool selected, ctrl-click the floor brushes until they're all highlighted. Then, when you have the con1_bord04 texture selected as the current texture, press the Apply Texture button. This will apply the texture to all sides of the selected brushes.
To do the walls, we'll do it a bit differently.
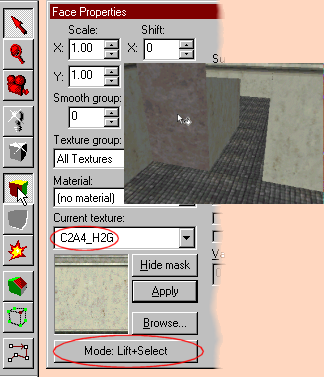
Toggle texture application mode on, and when the Face Properties dialog comes up, make sure that the Current texture is c2a4_h2g and the button at the bottom says Mode: Lift+Select. Now, in the 3D view, click on all of the walls with the right mouse button. This will apply the current texture to the wall. Move around the level as described in using the camera, and apply the texture to all of the walls.
What's behind door number one...
Press F9 and Enter to compile and run the map.
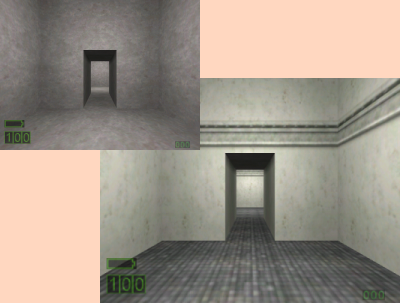
This is a tad better. In the next tutorials, we're going to make the lighting a bit more realistic, and add some details to the rooms.
Related Topics: