tutorial: the first room (tut1.rmf)
The first obstacle most people encounter when learning to build in 3D is how to make that first room.
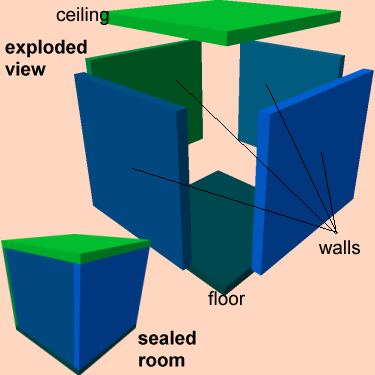
A basic room is a floor, walls and ceiling. This requires 6 brushes (solids). The exploded view of a room should make that quite clear. Note that a room must be sealed in order for it to be compiled properly.
Selecting a Texture
First, you'll want to pick the texture you want to work with.
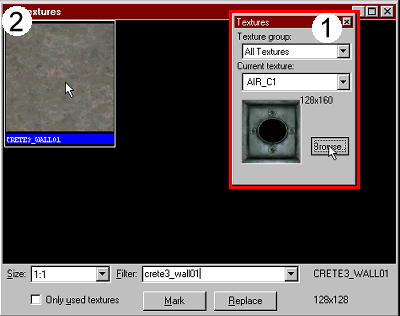
1. On the Textures dialog, click on the Browse button. This will bring up the texture browser.
2. In the texture browser, in the Filter box, enter crete3_wall01. This will narrow the texture group down to only the textures with the filter string in their name. You should be left with only one texture available. Select that.
Note: You don't need to use the filter to select a texture; you can, instead, use the scroll bars and search through the complete texture list. The texture filter was used here to make it more simple.
Creating the Room
Now, construct the room itself.
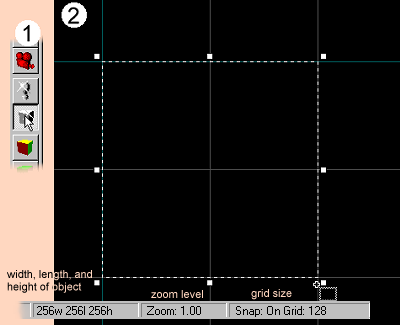
1. Select the Block tool by clicking on the icon on the MapTools toolbar, or by pressing Shift-B.
2. In one of the 2D views, click-drag (with the left mouse button) a box that is 256 x 256 units. In each 2D window, make sure the box is 256 x 256 units. When it is set correctly, press Enter to create the box.
Tips: The status bar at the bottom of the screen holds some useful information for you. The numbers in the box third from the left hold the width, length, and height of the current object. This can be adjusted by manipulating the object in the 2D windows.
Second from the left is the zoom factor for the currently active 2D window. This can be adjusted by placing the mouse cursor in one of the 2D windows and pressing the plus and minus keys, by pressing the numbers 1 through 0 for preset zoom settings, or by switching to the Magnify tool and pressing the left mouse button to zoom in or the right mouse button to zoom out.
The last section of the status bar holds the grid setting for the 2D windows. This can be adjusted up or down by pressing the left square bracket and right square bracket ([ and ]), or through the grid settings option in the Map menu.
Now, you have a single, solid cube. To make it a room, continue with the following:

3. Switch to the Selection tool, and click on the "x" in the middle of the newly created object. This will make the object selected. You will be able to tell a selected object by its red outline.
4. Click on the object with the right mouse button, and select Hollow from the menu. You will be prompted for a value for the wall thickness. Enter 16 and press Enter.
The Player Starting Point
You also obviously need a place for the player to start. This is done by placing an info_player_start in your level.
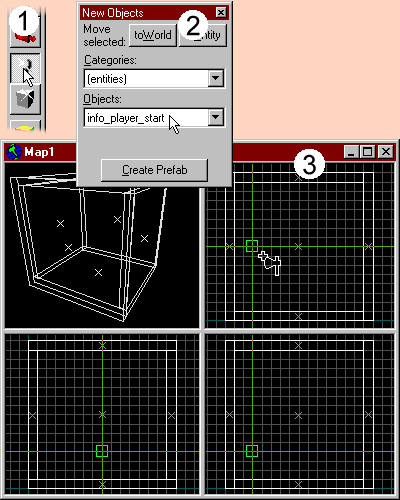
1. Select the Entity tool from the MapTools toolbar
2. In the New Objects dialog, select info_player_start from Objects list box.
3. With the left mouse button, click in one of the 2D views. The entity placement cursor will appear (in green). You can use this to position the entity in each of the 2D views. When you have it approximately where you'd like it, press Enter to create the entity.
Let There Be Light!
If you have no lights in your level, everything will appear black. For this first example, we will place a point light in the level.
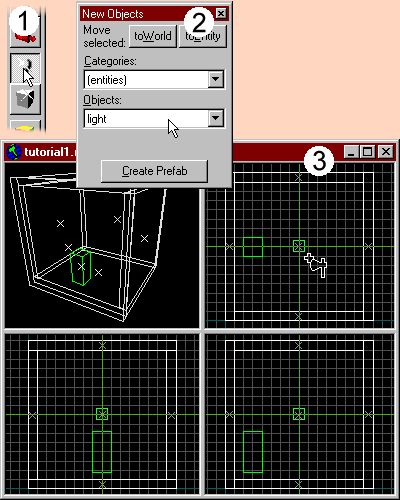
1. Select the Entity tool from the MapTools toolbar
2. In the New Objects dialog, select light from Objects list box.
3. As above, place the entity in the level. This time, center it in the middle of the room. Press Enter to create it.
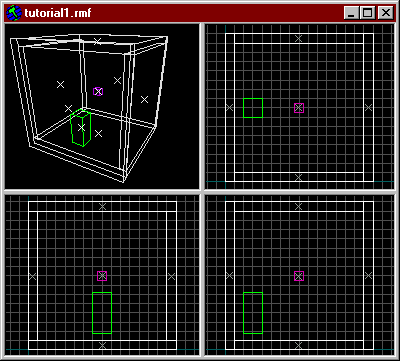
Your level will now look like this:
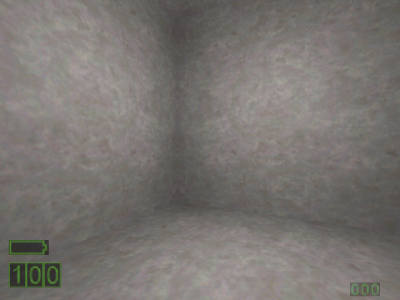
Run this puppy
To run your level now, press F9, then Enter. The level certainly isn't very exciting yet, just a square room with concrete walls, floor, and ceiling.
In the following tutorials, you will connect this room with another, and begin adding details and different lights. Eventually, we'll be placing a few monsters to make things interesting.
Related Topics: